O'Reilly의 책을 참고하고 있으므로 아래 샘플앱 코드를 참고
https://github.com/bonniee/learning-react-native
본 내용은 가능한 윈도우 기반으로 설명토록 하겠습니다.
윈도우 커맨드를 통해 WeatherProject 생성
react-native init WeatherProject
WeatherProject폴더 밑에 index.android.js 생성
* iOS를 사용한다면 index.ios.js 생성
import { AppRegistry } from 'react-native'
import WeatherProject from './WeatherProject_Part1'; //class import
AppRegistry.registerComponent('WeatherProject', () => WeatherProject);
깃허브의 src/Weather에서 WeatherProject_Part1.js 파일을 로컬 WeatherProject로 다운로드
# WeatherProject_Part1 간략 코드 설명
constructor(props) {
super(props);
this.state = { zip: "" };
}
//render 함수 이전에 zip 변수 초기화
_handleTextChange = event => {
this.setState({ zip: event.nativeEvent.text });
};
//Text change event의 결과를 zip 변수에 저장
render() {
style={styles.input}
onSubmitEditing={this._handleTextChange}
// render()내 onSubmitEditing에 _handleTextChange을 연결
}
const styles = StyleSheet.create({
container: { .. }
})
// render내 스타일 속성 정의
WeatherProject내에서 react-native WeatherProject 실행
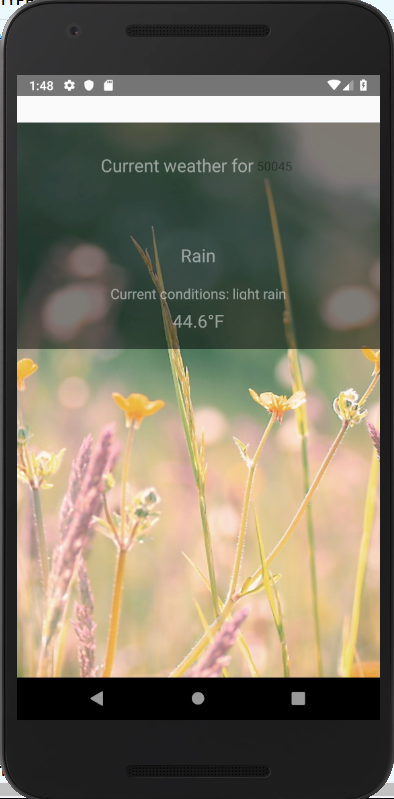
zip code를 입력받아 날씨 정보를 서버로부터 받아 보여주는 코드를 추가해본다.
깃허브의 src/Weather에서 Weather.js, Forecast.js, open_weather_map.js, flowers.png 파일을 로컬 WeatherProject로 다운로드
* index.android.js의 import WeatherProject from './WeatherProject_Part1';를 './Weather';로 수정
iOS image file 추가 : Images.xcassets/ 폴더 선택 -> New Image Set
* Image Set은 파일 이름과 동일 하게 설정
안드로이드 image file 추가 : WeatherProject/android/app/src/main/res의 모든 하위폴더에 이미지 파일 추가
# Weather.js 코드 설명
import React, { Component } from "react";
import { StyleSheet, Text, View, TextInput, ImageBackground } from "react-native";
//Image가 패치되어 ImageBackground를 사용
import Forecast from "./Forecast";
//날씨 정보의 결과를 저장하는 객체
import OpenWeatherMap from "./open_weather_map";
//서버에서 날씨정보를 받아오는 모듈
_handleTextChange = event => {
let zip = event.nativeEvent.text;
OpenWeatherMap.fetchForecast(zip).then(forecast => {
this.setState({ forecast: forecast });
});
};
//zip code를 입력받으면 zip 변수에 저장하고 날씨 정보를 받아 forecast 형태로 저장
render() {
let content = null;
if (this.state.forecast !== null) {
content = (
main={this.state.forecast.main}
description={this.state.forecast.description}
temp={this.state.forecast.temp}
/>
);
}
...
} //forecast 객체가 채워지면 content에 담는다.
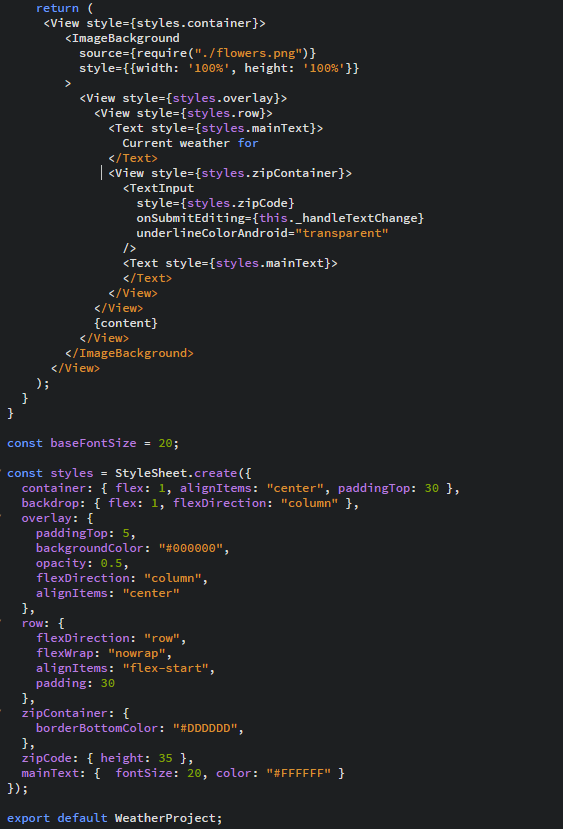
나머지 render 코드 내용은 아래와 같다.
- Image component가 하위 component를 가질 수 없도록 패치가 되어 ImageBackground를 사용
- 레퍼런스 코드의 TextInput의 속성에 대한 결과가 예상과 달라 아래와 같이 StyleSheet 수정
* Style 속성 값 추후 수정 필요
'React native' 카테고리의 다른 글
| Todo 1 (0) | 2019.12.25 |
|---|---|
| State, Props, Lifecycle (0) | 2019.12.25 |
| Project 생성 및 빌드 (0) | 2019.12.25 |
| React native intro (0) | 2019.12.25 |
| React native 설치 (0) | 2019.04.14 |